Top 9 Stain Removal Techniques
Below I've listed and explained the top nine stain removal techniques to learn and use to effectively and safely keep items in your home, especially fabric, upholstery and carpet, stain free.

Removing stains isn't necessarily hard, if you know what you're doing, but it is key to use the right techniques to get the job done. There are nine main techniques to master, none of which are very complicated.
1. Blotting The Stain - Not Rubbing It

The most common technique is to blot at the stain with a clean white cloth. You can use this technique at several different points in the stain removal process.
First, use it when you first get a stain on something to dab at the area to remove excess residue from the stain, while it is still fresh. Be careful not to smear the stain around further in the process.
Second, once you begin trying to remove the stain you can saturate the area with a stain remover and then, again, dab or blot at the stain to help lift it out of the fabric or fibers and onto the clean white cloth you're blotting with.
There is a certain technique to use while blotting to get the best results. You need to dab lightly at the stain -- never rubbing it, which only can grind the stain further into the fibers.
Further, work from the outside edge of the stain inward, so that you are careful not to spread the stain further as you try to remove it. In addition, as you slowly remove the stain from the fibers be sure to switch to a new area of cloth or paper towel to continue blotting with, so you don't accidentally re-transfer stain back onto what you're cleaning it.
2. Brush Off The Excess Dried Stain
Along with blotting there are three other major stain removal techniques which are used to remove excess amounts of stains, splatters or spills from fabric, upholstery or carpet, all listed directly below from #2-4. The first of these is brushing, which works well for dried on gunk.

This one seems pretty obvious, and it really is. You should brush off excess dried mud or other dried excess spill or stain from items before you begin to treat the stained area.
The best tool to use is typically an old toothbrush designated only for this purpose, and you need to be careful not to rub, but just to lightly brush the area.
You can read more toothbrush uses for cleaning and stain removal here, plus more information from me about this technique.
3. Scrape Off The Wet Excess Stain
While brushing works best for dried on gunk, scraping works better for wet excess stain.
Now, when I say you should "scrape" the stain off the fabric or stained area I'm not talking about scratching up or marring the stained surface, nor grinding the stain into the fabric.
Instead, use a dull knife to take the top layer off the excess stain. For example, you may want to scrape off excess peas baby food from the bib before you try to treat the stained area.
Be sure when you use this technique that you don't spread the stain further, so do it carefully.
4. Soak Up The Stain (Especially Useful For Greasy Or Oily Stains)
When you've got an oily stain, you've got to soak up all the excess grease and oil before you can begin dealing with the stain itself. That is where baking soda or cornstarch come into play for fabrics, upholstery and carpet. Similarly, cat litter can work well to soak up excess oil from a driveway, for example.
To use this stain removal technique just sprinkle an absorbent onto the greasy spill and allow it to sit for a couple of minutes to absorb the excess grease, and then use the brushing technique mentioned above to remove the excess.
5. Flush The Stain With Running Water
Now, the following stain removal techniques listed below are all about how to remove the stain, once you've already removed the excess stain from the area and are left with the part that has stained the fibers.
One of the most popular stain removal techniques is to flush a stain with runnning water to help remove it.
This technique works in two ways -- physically flusing out the stain from the fibers with the moving water, and using water (or another liquid) as a solvent to remove the stain, at the same time.
The easiest way to flush out a stain is to hold the fabric under running water, such as under the tap at the sink. Obviously, you can only use this method for clothing or items that can get really wet and then laundered, and so it won't work for carpet or upholstery.
Be careful to only flush with cold water if you don't know what kind of stain you've got since heat can set certain stains (especially protein based ones). However, a variation of this method is often used successfully to remove stains that are cleaned with hot water, such as berry or wine stains. In this method you boil water and pour it over the stained area to remove the stain. To find more details about this variation of the flusing technique check out this article about using boiling water to remove stains.

In addition, if you'd like to not get as much of the item wet, and still use this stain removal technique, you can use an eye dropper to slowly drip water onto the stained area, which also can flush out some of the stain.
If you use this method have an absorbent cloth placed underneath the stain to catch the stain and water (or other solvent) as it moves through the fabric. You should move the absorbent cloth around as you work to make sure you continue to absorb the liquid and don't re-transfer the stain back onto the fabric.
6. Tamp The Stain To Break It Up

Tamping is probably the most overlooked of all the stain removal techniques listed, but is very helpful for breaking up hard to treat stains, especially for areas in which you can't wash the fibers, like on upholstery or carpet.
Tamping a stain basically means hitting it out of the fabric with quick whacks with a stiff brush. Don't confuse tamping with scrubbing, which as I've explained is a big no no.
With scrubbing you rub at the stain with the brush, back and forth. When tamping you hit the stain, using an up and down motion with the brush. Below is a video where Martha Stewart gives a good example of tamping a stain (you have to watch for a while in the video to get there though).
7. Sponge The Stain With A Stain Remover Or Solvent
Finally, the last few stain removal techniques I've listed are ways to apply a stain remover or solvent to the stained fabric or fiber, to help remove the stain.
The first of these stain removal techniques is to sponge the stain with a stain remover. Basically, with this technique you get stain remover or a solvent (such as dry cleaning solvent, and place a small amount onto a sponge or clean cloth and dab that onto the stain.
This technique is similar to blotting, but generally involves using a bit more liquid on the absorbent cloth you're dabbing with.
8. Presoak The Stain For An Hour To Overnight
The next of these stain removal tecniques, and my favorite as a busy Mom, is presoaking. With this technique you just dump water plus some stain remover, bleach, presoaker, detergent, or whatever else you've determined will work best to clean the item, into a large tub, or a sink basin, place the clothes in with it, and let it sit there and work on removing the stain while you walk away and do other things.
The longer it soaks the better it works, in general. However, a word of caution with this technique is that too long a soak, especially in things like chlorine bleach, can damage the fabric or make it fade, so you have to be careful when presoaking.
You can learn more about presoaking laundry stains here.
9. Pretreat The Stain With A Stain Remover

![]()
The last of the stain removal techniques I've listed is also one of the most popular, although it doesn't always work as well as some people want. It is pretreating a stain with a laundry stain remover before washing (click the link for a more detailed article on this topic).
How effective this technique is depends on the type of laundry stain remover used, the stain it is on, how old the stain is, and how well you spot all the stains and pretreat them before throwing them in the wash.
The idea with this technique is simple though. You find the spots and stains, spray or rub a stain remover on then, and then wash like you normally would in the hopes that this extra step will be enough to remove the stain, along with regular washing.
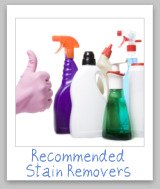
If you're looking for an effective pretreater I'd suggest reading the laundry stain removers reviews I've got on the site, from readers like you, sharing which products worked best for them on which types of stains.
Additional Stain Removal Techniques For Specific Situations
The nine stain removal techniques I've listed above are the most common, but depending on the situation you may also use the bonus techniques listed below.
- Freezing - Hardening the staining substance by freezing it works well for two specific, but common stains, candle wax and gum.
- Sticky tape - This is used to remove grains of pollen from things, before it gets wet and makes a bigger stain on clothing.
There are affiliate links on this page, and if you purchase a product through them I receive a small commission. Purchasing through my links costs you nothing extra, but helps support the free information provided on this site and my family. To learn more please see my product review disclosure statement.
Thanks For Visiting My Website: Grab Your Free Gift!

Hi, I'm Taylor, a busy mom with 3 kids, so I have lots of hands on experience with house cleaning, laundry and my fair share of spots, spills and other messy catastrophes. Thanks for visiting my site.

I update the website all the time with tips, tutorials, cleaning recipes, reviews of products from readers like you, and tests I've done on various cleaners, removers and laundry supplies.
I'd love to give you a gift! When you subscribe to my free weekly newsletter you will receive a free printable laundry stain removal chart that you can reference as needed.
I hope you enjoy this gift, and stop by again soon!
Related Pages You May Enjoy
Top Ten Tips For Removing Stains Plus Glossary Of Terms
A-Z Guide: Step By Step Instructions For Removing Over 100 Types Of Stains
Go From Top 9 Stain Removal Techniques To Home Page
CAUTION: This website is provided for informational purposes only. It is provided as is, without warranties or guarantees. Some stains and messes just won't come out, and are permanent. Further, some cleaning methods can harm your item, so if what you want to clean or launder is sentimental or expensive call a professional. See disclaimer of liability for more information.
Popular Articles
Top 9 Techniques For Spot Removal
Let's Stay Connected!
![]()
![]()
![]()
Get Free Email Updates
(and get a FREE printable)
Related Pages
 A-Z Guide: Instructions For 100 Types
 Stain Removal Products Reviews
 Visit Household Management 101
 Visit Home Storage Solutions 101